What exactly is a Spirit Level?
A spirit level is a long device that is used to measure a horizontal plane. It is almost (aesthetically) like a long, thick ruler, but it does not measure in metric or imperial measurements as a ruler would. Instead, it uses a bubble vial to determine how straight a surface is.
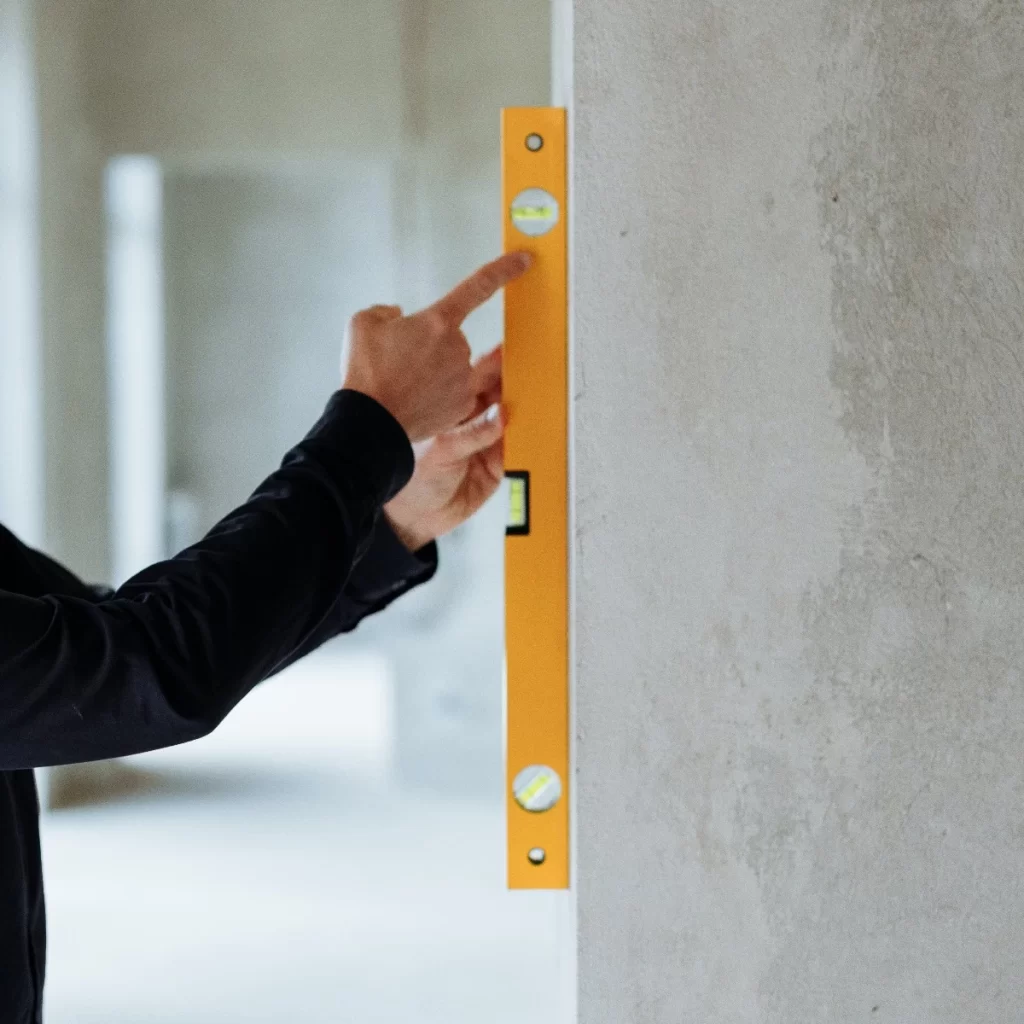
With some spirit levels, measurements can also be made vertically (called plumb in the trade), or at 45° angles. Levels like this will have additional vials for these specific measurements.
It is common for some levels to have 2 to 3 vials – these are usually the most accurate, as they can check both ends of the surface and often make plumb measurements, too. The more angles you can check, the better the result.
Measuring a perpendicular (plumb)
How does a Spirit Level work?
Inside the vials (small glass tubes; often in green), there is a mineral spirit solution. This solution has a bubble of air that moves from left to right as you tilt the level. The bubble will move exactly to the centre of the guide lines when a surface is level, thanks to the vial’s slightly bowed shape.
If you have horizontal/plumb vials on either end, the bubbles will both need to be centered to determine that the surface is level.
Centered bubble vial
An example of using a spirit level when putting up a shelf:
Position the spirit level horizontally against the wall, roughly in the middle of where the shelf will go. It should be held completely still so that the surface is flat and the level is not wobbling
Move the level until the vial(s) are centered. This might mean tilting it ever so slightly if you’ve not got it straight
Once your level is in the correct position, mark a horizontal plane using a pencil
If you want to, you can turn it around at 180° to check the bubbles line up upside down, too. Mark similarly with a pencil and your markings should be in line with each other
Put up your shelf
Test the surface of the shelf by popping the level on top. The bubble(s) should be right in the middle of the guide lines. If they are too far left or right, you need to adjust the shelf placement
Testing for accuracy
Before any real work is done, it is always best to test the accuracy of your level. Both new and old levels will need to be tested, as newer levels could have been dropped and damaged in transit, whereas older levels may have defects from casual wear and tear.
To avoid ending up with crooked pictures or uneven tiling, do the following with your level to test it out. This can be done using both vertical and horizontal vials:
Place the level on a flat surface. This could be a tabletop, door frame or desk – whatever is convenient
Check that the bubble is perfectly centered. If it is not, try another surface
Mark the end of the level and the side of the level on your surface using a pencil
Turn the level 180° to the same position but reversed, using the marks as a guide. The bubble should be centered again
If the bubble is not centered, there may be an issue with your level. Use a different level if the degree of inaccuracy (the difference between the first bubble position and the reversed) is too great